It was supposed to be a $100 Room Challenge
I love to decorate but I don’t have the means to just go out and buy whatever my heart desires, and I would venture to bet that’s the case for most people. From time to time, I’ve shown pictures of my home or a DIY and friends have oooed and aaawed and made comments like
“I wish you could come help me with my house!”
I’ve always responded saying that I would love to, but it never really happened. Maybe it was because they thought I was joking or that I would charge an arm and a leg, but whatever the reason, it never happened…… until recently!
The $100 Room Challenge
I had this idea! I love to transform spaces and I’m pretty good at bargain shopping and DIY’s, so why not challenge myself to see if I can transform a space for $100.
I made a Facebook post asking friends if they were interested.
I told them they would be giving me $100 and I would use every penny to make over a space in their home in exchange for them allowing me to take before and after photos for this blog!
Well, needless to say, there was great response! Who wouldn’t want free design and labor?? I was sent over 30 rooms to consider!
Although they all looked like fun to me, 6 rooms spoke to me in one way or another.
One specifically tugged at my heart.
Looking back, I now know it was God. He was nudging me to give it a try but I was concerned I couldn’t do enough.
I had already contacted this friend and told her that although I would love to do her space, I just couldn’t see making much difference for $100.
I started to put that room out of my mind and move on to “blog worthy” spaces that would have wow factor for a small price tag.
But God had other plans
I looked through room after room but kept coming back to her space. I decided that even if all I could do was brighten up the walls with a little paint, that it would be worth it! So, I chose her space, knowing the wow factor was going to be minimal.
this was more than a room makeover.
This was an opportunity to show the love of Jesus.
A piece of their story
This family went from a family of 3 to a family of 7 in a matter of a couple months.
After having their daughter, they struggled with infertility. Then, mom had to make a decision that would mean biological children would no longer even be an option. But their hearts were open and they had more love to give so they decided to become foster parents.
It didn’t take long for them to have 3 teenage boys come into their lives followed by a 4th two months later.
They welcomed them into their home.
- Even when the space didn’t feel perfect.
- Even though teenage boys are completely foreign to them.
- Even though it would turn their world upside-down.
Announcing the chosen spaces
So, I posted photos of the 6 rooms I had chosen and hers was one of them! I let her know that I wasn’t exactly sure what I could do, but I would do my best, even if all I could do was paint the walls.
Disclosure: Our shopping links are sponsored, or affiliate, links, which means that we could earn a small commission that helps fund our blog (at no additional cost to you!), so thank you for your support and happy shopping!
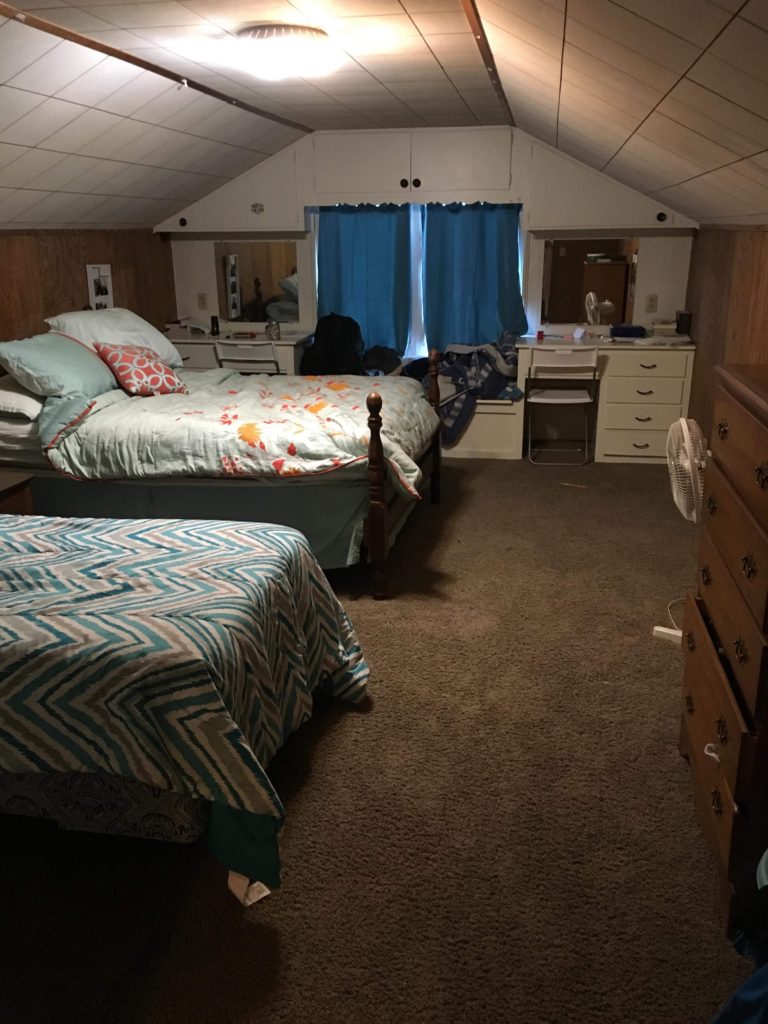
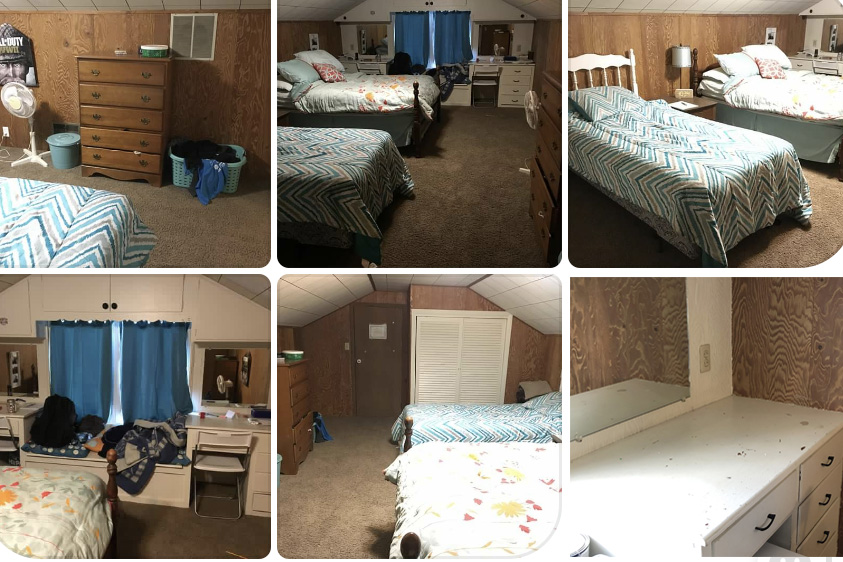
As I reviewed the photos, I started making a mental list of issues I could see. I like to design around clutter. We have to live in our spaces after all. Let me tell you what I mean.
Designing with Purpose
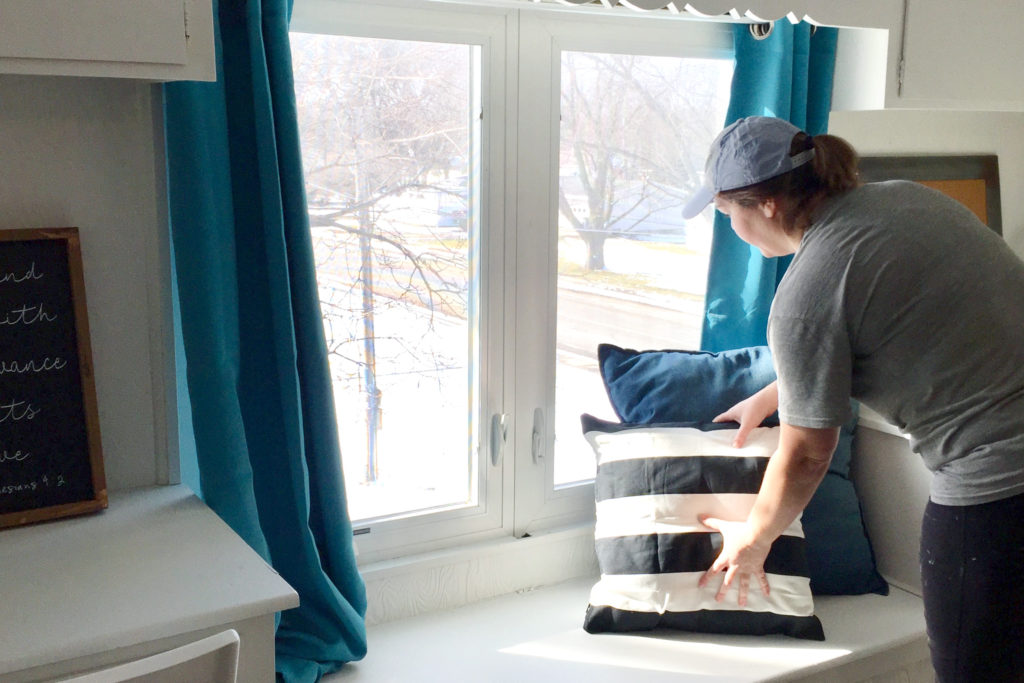
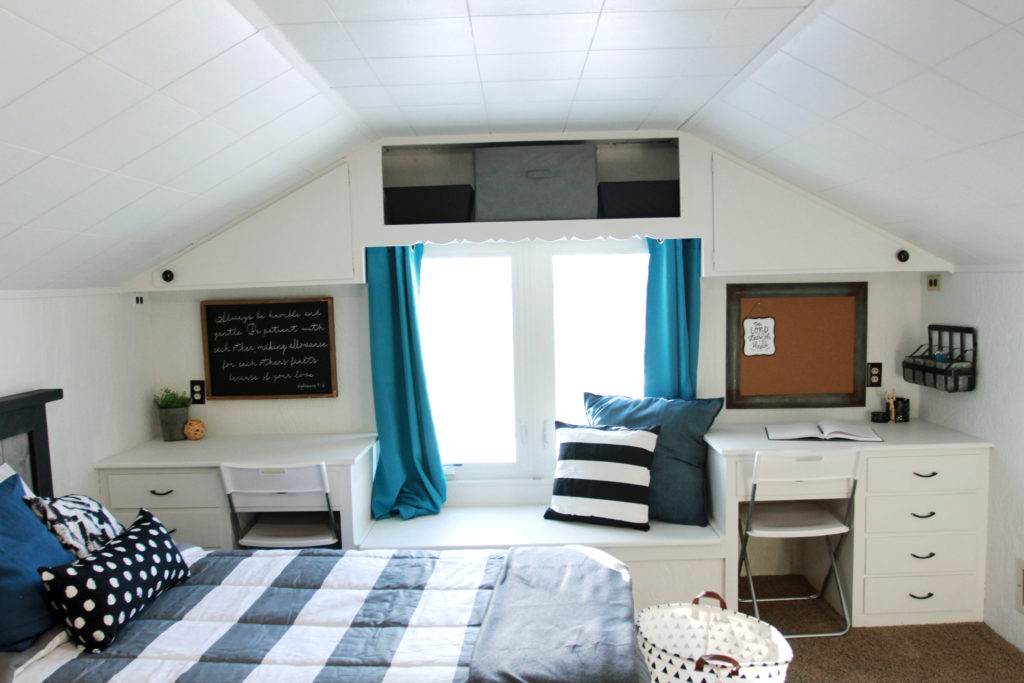
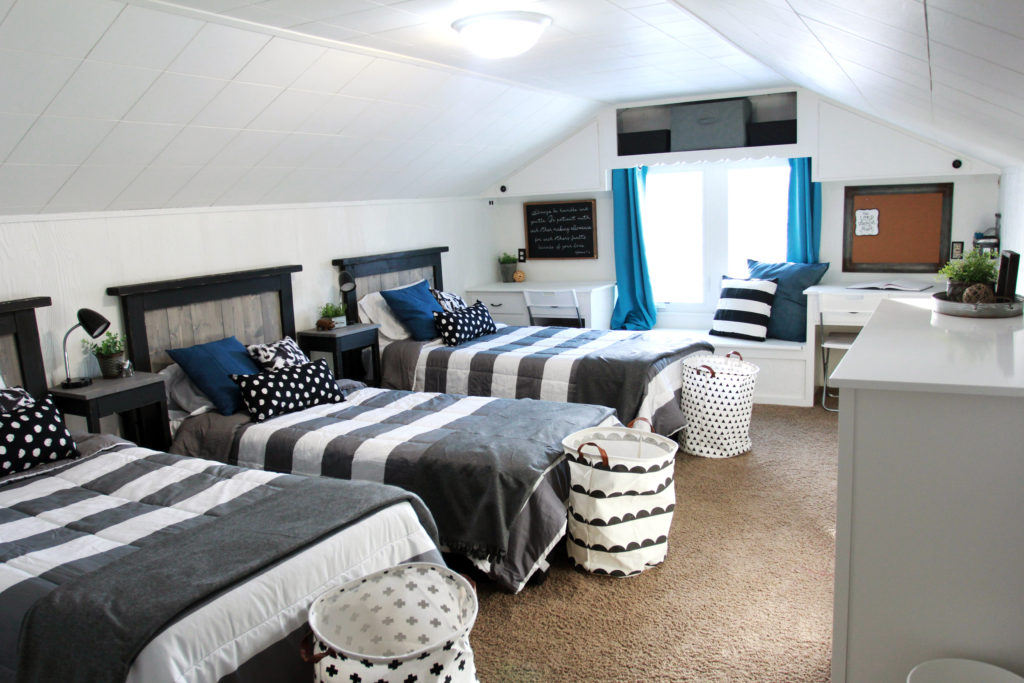
- The window seat was collecting extra stuff. It also didn’t seem like the pillows were doing it any favors. They likely made it more difficult to sit and they were probably on the floor more than the seat.
- The built-in area felt a bit dated and boring.
- The miss-matched headboards created more of a distraction rather than a cohesive look. (I considered painting them all the same color as different style headboards painted the same would have given a look of cohesiveness and interest.)
- The dark walls were making the room feel small and unwelcome.
- The mirrors on the back wall were basically useless for these boys. They have their own bathroom upstairs and they just looked dated.
- There’s not enough laundry storage. There were dirty clothes in multiple locations throughout the room.
- The only artwork was a poster of an army guy from a video game staring at them from across the room.
- The dresser wasn’t large enough for multiple kids.
- There was trash around beds, telling me they needed more trash bins.
- I also noticed while there that one boy was an incredible artist.
By starting with the clutter, I was able to design with purpose.
It’s important that the design has the potential to be lived in and kept nice. Something I specifically look for is where stuff piles up. The goal isn’t to just make it disappear and hope the kids can change their habits to fit the design.
Your best bet of having your kids keep their room clean, is to design within their habits.
spot the clutter zones
Trash piling up beside their bed? Well, come on now! You’ve place a trash can in the corner of their room by the door! It looks nice there and fits perfectly! They need to walk their dirty tissue over there and throw it away!!
Oh please! I have 4 boys and let me tell you, our lives all improved when I changed my “perfection” mindset and started designing the clutter.
Place the trash can by the bed. It’s ok that it doesn’t look ideal. This should eliminate the trash on the floor and that, in itself, is perfection.
Clothes pile up in the bathroom, on the dresser, and in the closet? You guessed it! Place a small laundry basket in each spot. (cute ones like these make it feel more put together and they cost about the same as ugly, plastic ones.)
This concept carries over to every area in your home. If everyone throws their shoes in a pile next to the door instead of in your organized coat closet- place a large basket next to the door. Paper and mail piles up on the table? Yep, you’re getting it! Basket, boom, done.
so much to do, so little budget
While I was pondering options, I had this tugging to see if anyone might be interested in donating money toward this makeover. It was going to cost way more than $100 to really make a difference. I knew this would change my blog post from $100 but felt led to ask anyway.
Blessed by strangers
At the same time, a friend of the foster mom had the same idea and in a half hour’s time raised $300.
Complete strangers to the family dug into their wallets and donated an additional $500+ from my asking.
I was blown away.
And so excited! The mom was told of the $300 and decided to selflessly use it all on the boys’ bedroom. She had the option of just using the $100 that was “required” for the makeover and then using the other $200 for other needs but she chose to give it all to me, knowing that would really help make their space feel more special.
I decided the money my friends gave would remain a secret! What an amazing secret to keep!
And so the shopping and the building began!

Keeping it simple
My first purchases were new comforters and sheets! I went with white sheets so that they could be easily bleached clean both for these teenage boys (lol) and for changing if there are future children that will grace this home. I also purchased each boy his own laundry hamper to help with the clothes clutter but for another important reason as well.
When kids share a space, they can lose the feeling of ownership. Giving them unique laundry bins of their own gives a sense of independence and will keep them accountable to keep their clothes picked up.
keeping it neutral
One struggle when designing this room was making it special for these boys while also making it gender neutral for the future. I did this by purchasing blue slip covers with soft pink pillow inserts. So, if girls one day occupy this space, all they need to do is slip off the blue covers to reveal a more feminine look.
I decided to try and keep the rest of the room neutral. Grey, white, and black (with a touch of brown) are the base colors I chose for this space. All of these colors can easily transition from boy to girl by simply adding a punch of pink or blue, etc.
It’s much easier to transition from boy to girl, so if you are unsure where to start when creating a gender neutral room, think more masculine than feminine. It’s simple to add a pop of pink and a furry blanket. Girls can totally rock a blue room by just softening some accents but boys may have a harder time feeling comfortable in a rose gold room with a chandelier.
out with the dark, in with the light
I decided to spread this makeover over a couple days. I knew it was going to take quite a bit of work to paint and boy did it ever. Hours were spent meticulously getting this room painted. We decided to try and paint all the cracks in the ceiling to give it a more solid look. What a tedious job but oh so worth it!
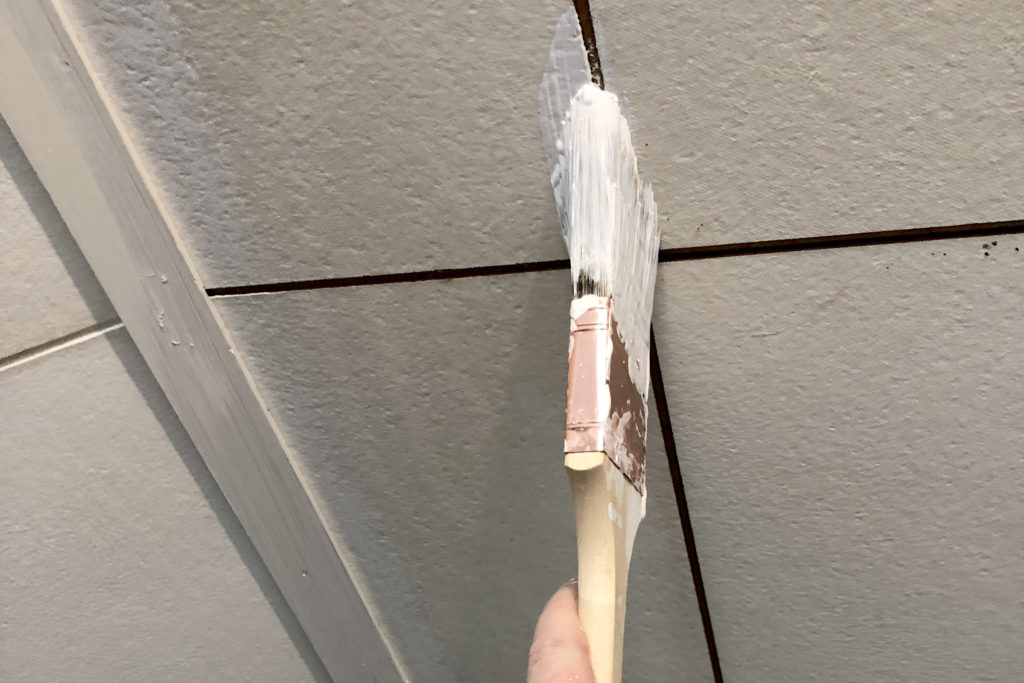
Painting these lines made a huge difference. We found the best way to paint was to have one person rolling the ceiling and someone coming along behind with a brush to push the paint into the cracks. Luckily, I had the help of my parents that day. We worked in tight spaces and had a number of laughs because of it. Side note: if possible, you should take everything out of a space before painting.
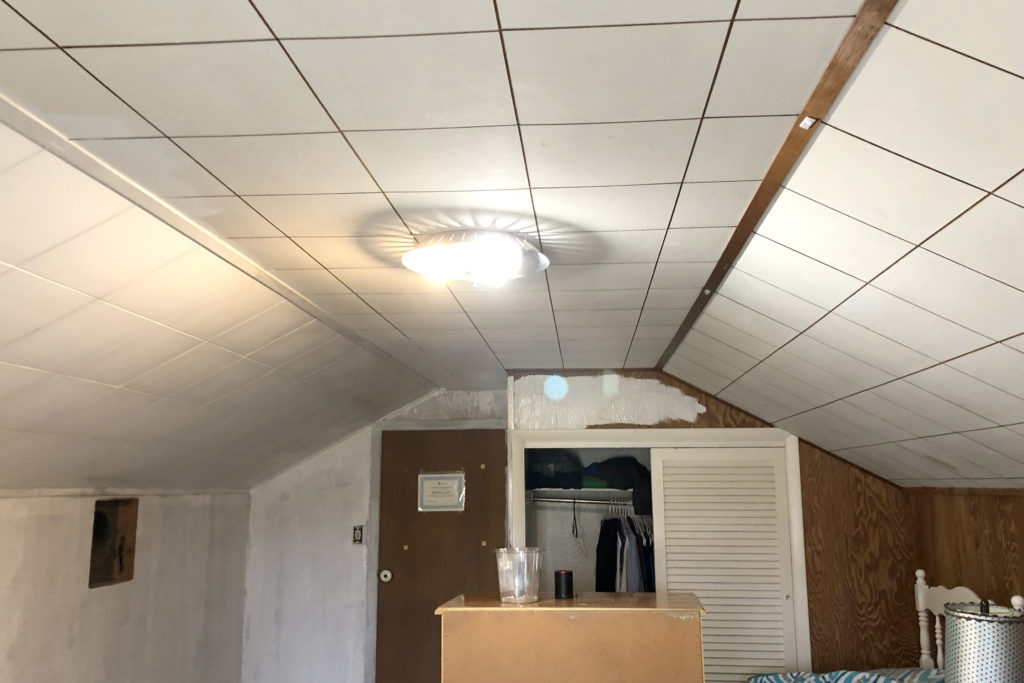
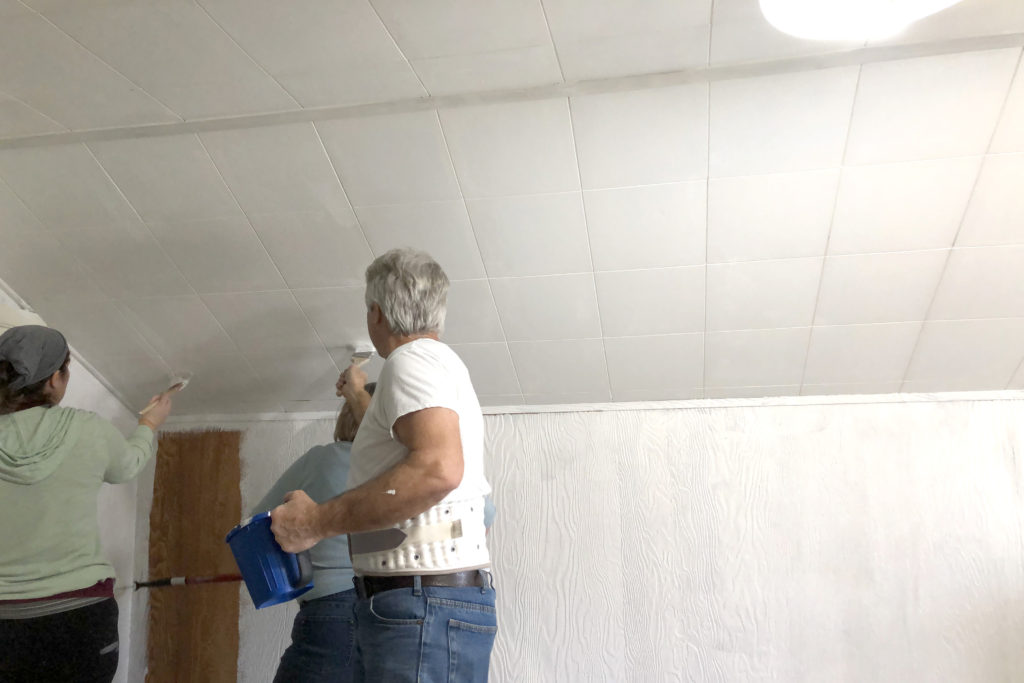
The white paint made a HUGE difference!
primed and ready to go
We started painting the walls with KILZ, a latex primer and sealer.
When painting over a dark color or wood, it’s a good idea to start with a primer. This makes your more expensive paint look much nicer, go on smoother, and take fewer coats! Well worth the extra time!
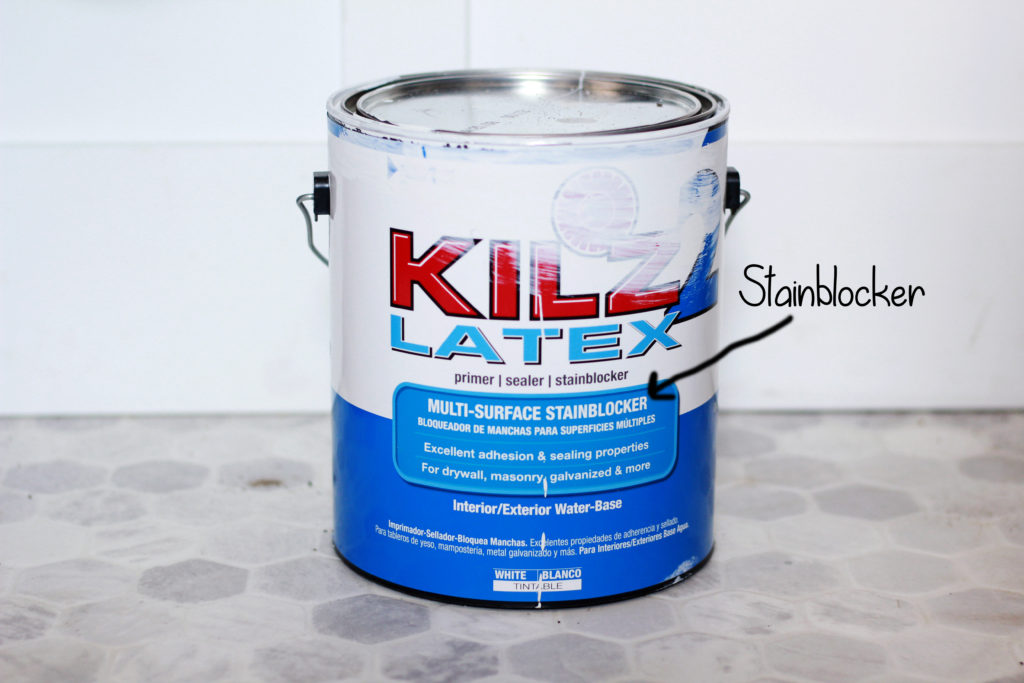
I went through a couple gallons of KILZ on this space and noticed one huge difference in my 2 gallons. The first one I used did not go on very thick. It wasn’t covering like it should. I noticed later that it DID NOT SAY STAINBLOCKER! What? I thought that’s what it was! But not all KILZ are created equal, so be sure to find the Interior/Exterior WATER BASED, STAINBLOCKER gallon! Don’t be like me. Do it right the first time.
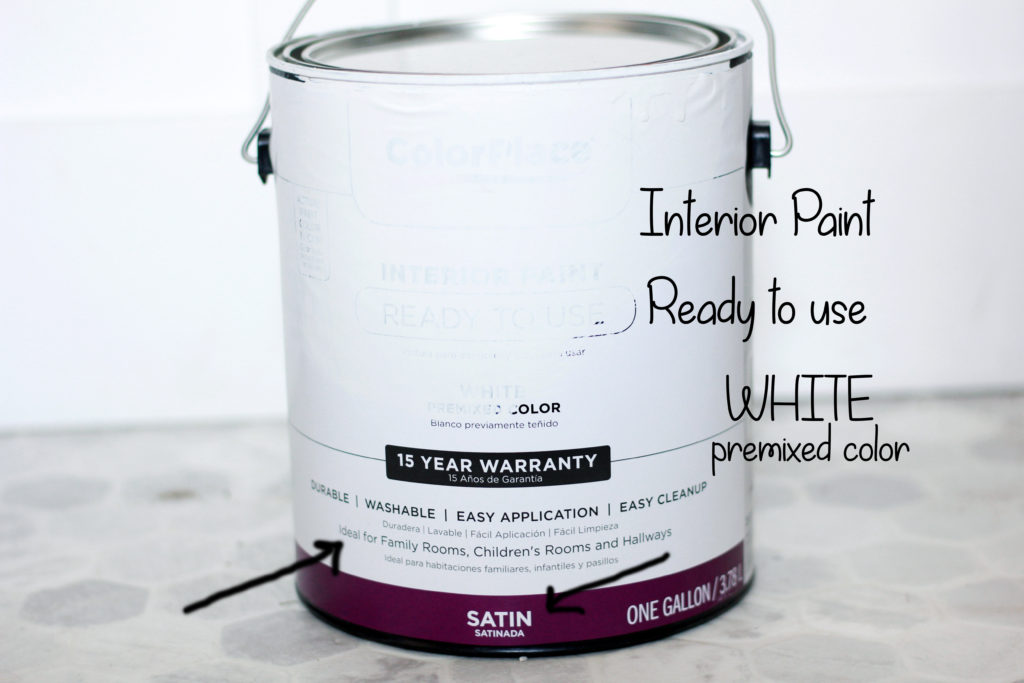
After the KILZ primer was dry, we started painting our color. Well, lack of color really since white was our chosen wall color.
paint finishes
Flat paint looks wonderful and rich but is not very wipeable and doesn’t clean easily. So for your high traffic spaces, where hands, crayons, and dirt touch the walls, I recommend a satin finish.
Glossy gives off a sheen and can show every imperfection in a wall. Although it’s easy to wipe, it doesn’t typically look great on a wall.
I like to work with a Satin finish. I feel it’s a perfect middle ground.
I picked up a couple gallons of premixed white paint from Walmart. Such a time saver, especially since there was nobody around to help me when I was in the paint department.
If there were somebody there, I would have asked them to give it a good shake in their fancy shaking machine, but I grabbed a few stir sticks and went on my way. An 18 month old in my cart guaranteed my shopping time would be cut short anyway.
When I was ready to paint, I gave it a few shakes myself and got a full body jiggle going before opening it and stirring it.
The walls and door, built-ins and closet all got a fresh coat of white paint!
Let it dry and say goodbye
I asked the family to not put anything on top of the freshly painted desk for 48 hours and to wait to put the drawers back in for 24 hours to keep scratching of paint to a minimum.
For the next week and a half, I shopped and designed and designed and shopped. I made a trip to IKEA and found some fun throw pillows and blankets, a light for the closet, and trash cans.
Hobby Lobby is where I found the signs, greenery, corkboard, and other décor. Love me some Hobby Lobby!
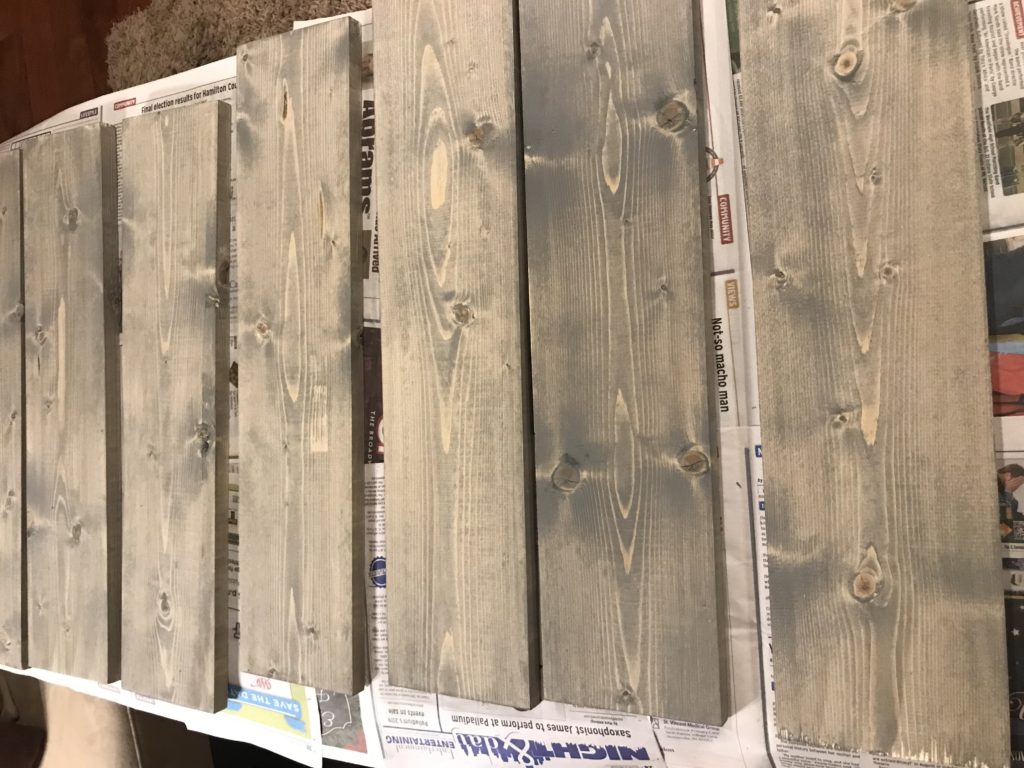
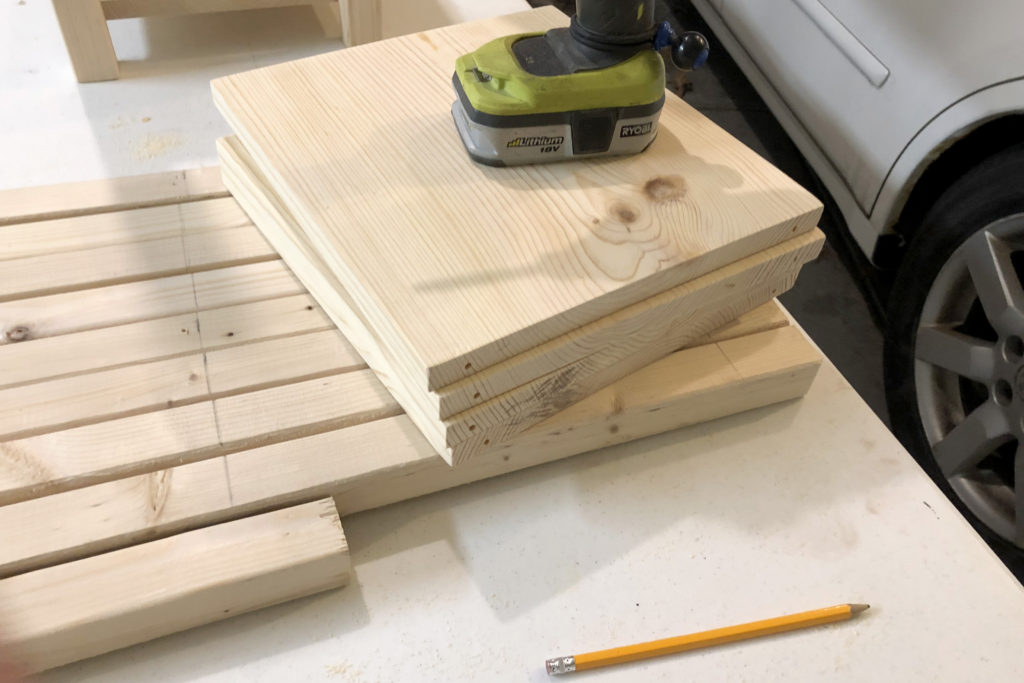
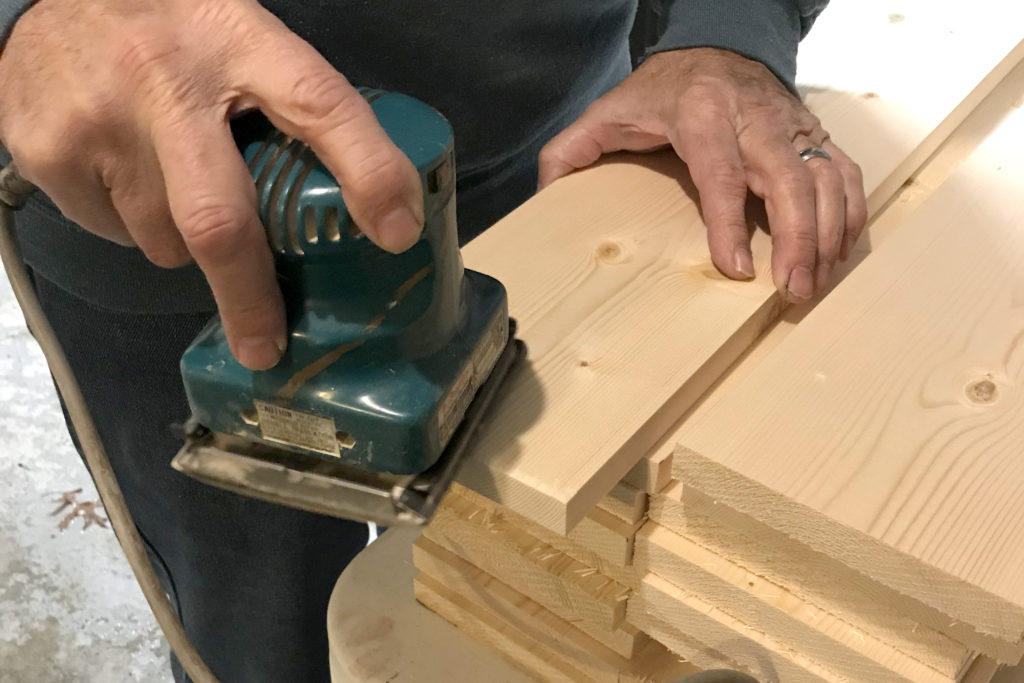
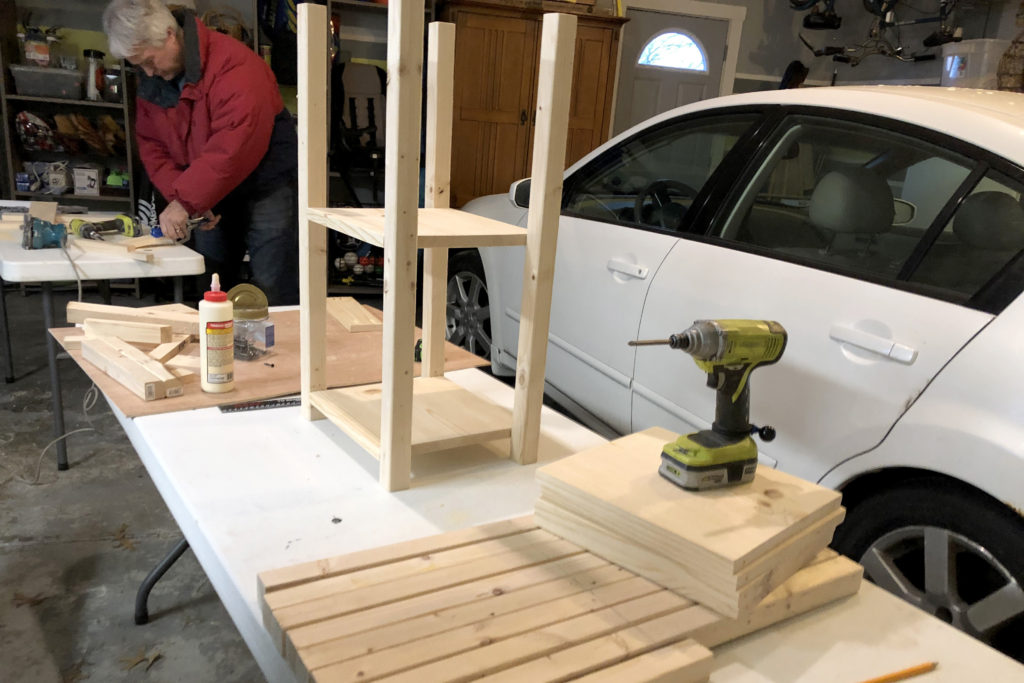
Meanwhile, I enlisted my parents to build the headboards and nightstands. What a gift they were to me. By being willing to make those items, my timeline and budget got to stay on track!
Putting it all together
The day finally came. I had all the furniture painted and distressed, décor purchased, and a sitter lined up to keep my kids for the day. I headed to the house and prayed that the vision in my head came out in the room!
A friend of mine came along and helped carry things in and even pitched in painting the fronts of the built-in desk drawers. My father-in-law also stopped in to install the new lighting and help me attach the new headboards to the existing frames.
I’m so happy with how this room came out!
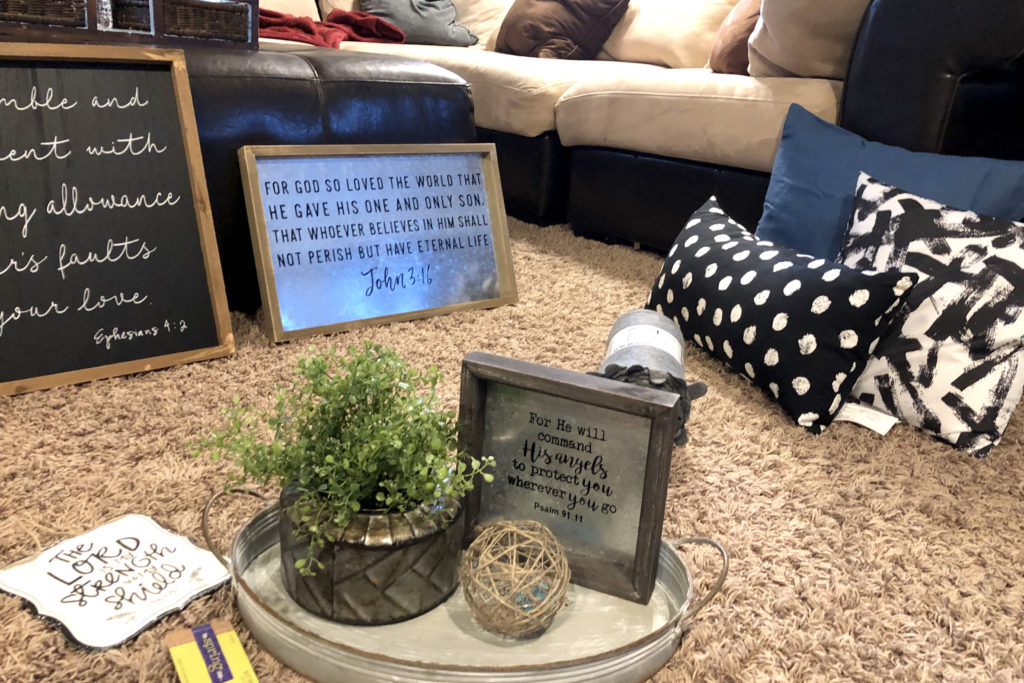
Create points of interest
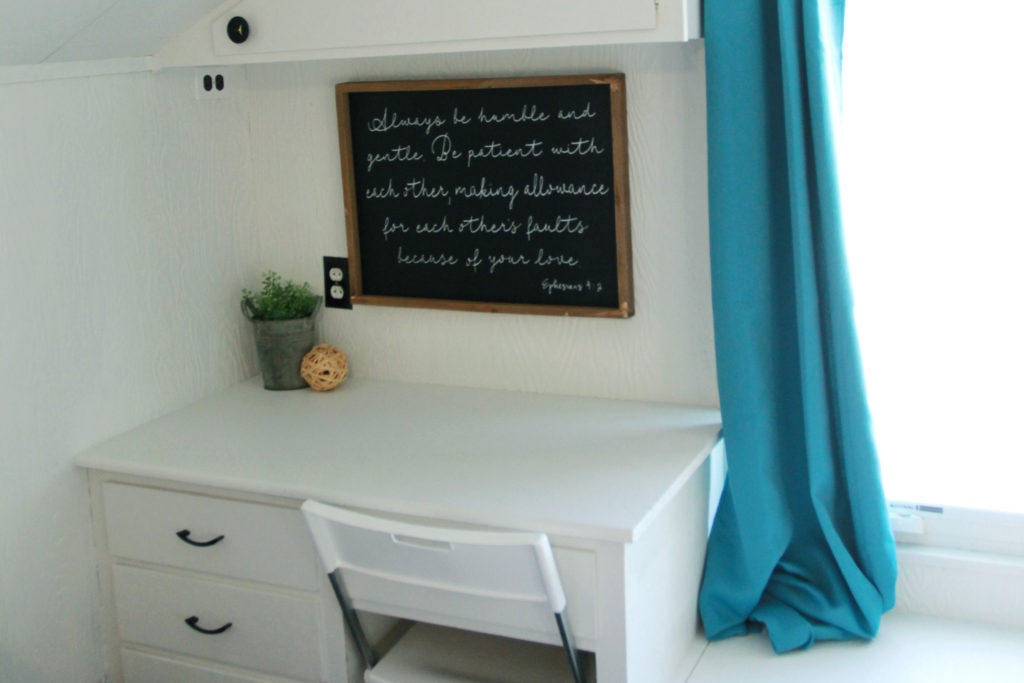
The mirrors were removed and replaced with a sign and a corkboard. The window seat actually has storage under the lid, so removing the plethora of pillows and repainting it made the most sense. You don’t need soft cushions under your tushy all the time.
Less is typically more
The eye can now focus on how cool the built-ins really are. I removed the top cabinet doors to break up the solid wall. Storage bins added a bit of a break to the white by adding some color and fabric texture.
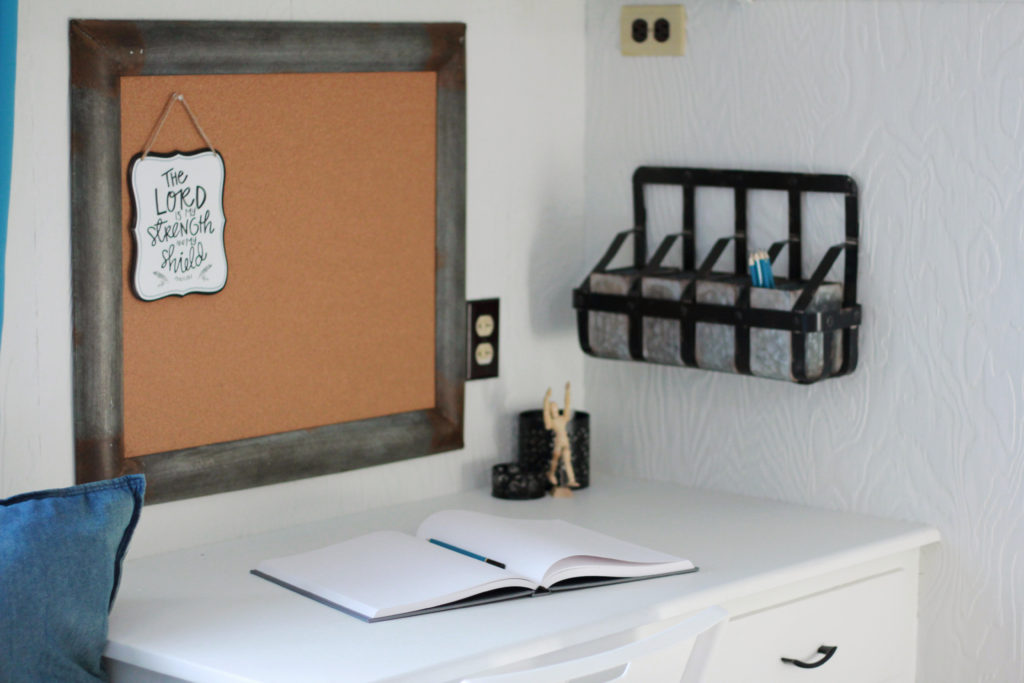
Keep the clutter off usable surfaces
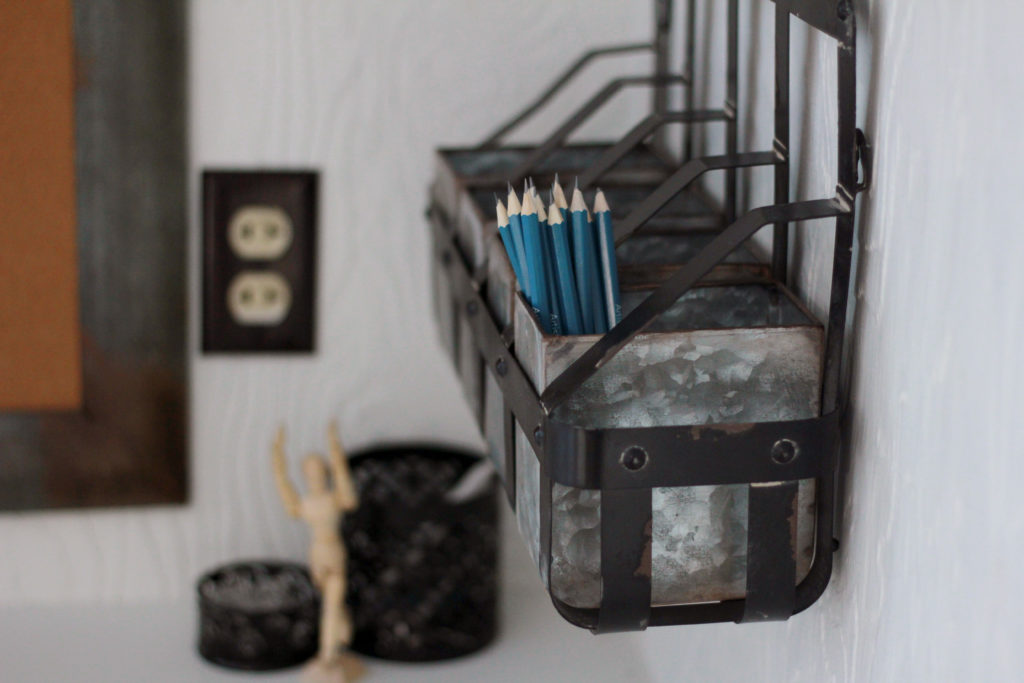
The desk on the right was much more easily accessible so I chose to make that the art desk. By placing storage on the walls, it really opened up the desk space for creating. The cork board and “art supply storage” were both found at hobby lobby.
Don’t forget to use the coupons always available on their website! Never pay more than 40% off by simply showing the cashier your coupon right from your phone! (Good for one regular price item)
And of course if you’re patient, most items are half off alternating weeks. Be frugal! It’s part of being a good steward of the finances we are blessed with, no matter how small.
grouping
When arranging décor, I like to group things in odd numbers and with varying heights. This creates interest and allows the eyes to flow from one item to the next in a pleasing way.
Trays are also a fantastic way to decorate! Not only do they ground your décor but they make dusting a breeze! Simply pick it up, dust underneath, and set back down.
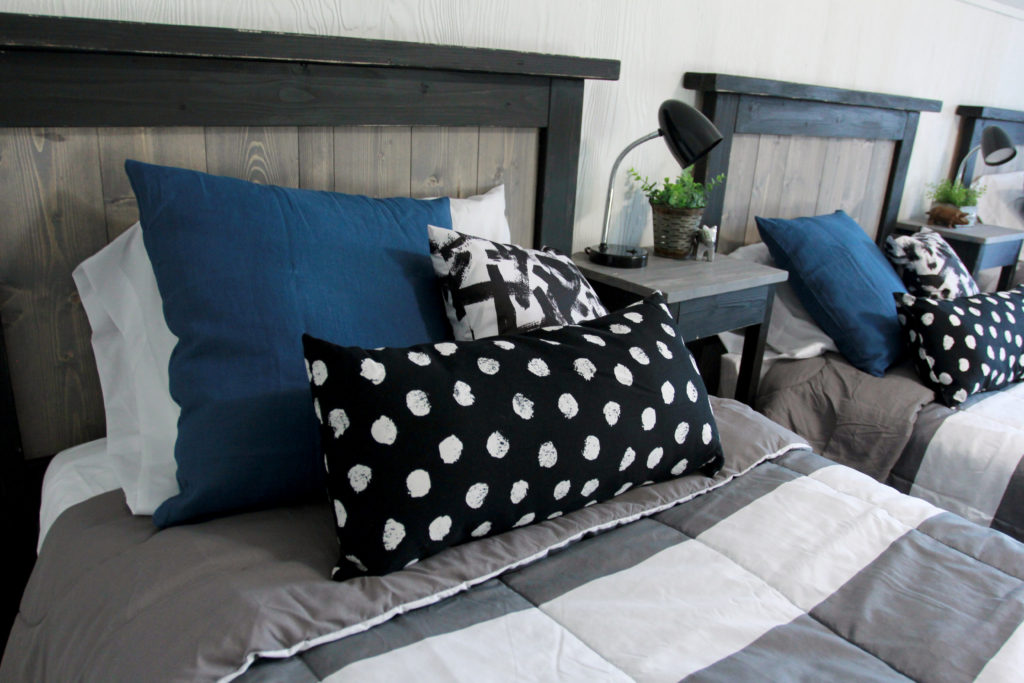
Again, I’ve decorated the bed with 3 pillows, arranging them by height and design. These are the blue slip covers that are covering a soft pink pillow lying just beneath the surface, ready to be easily swapped if necessary. All of the pillows were found at IKEA.
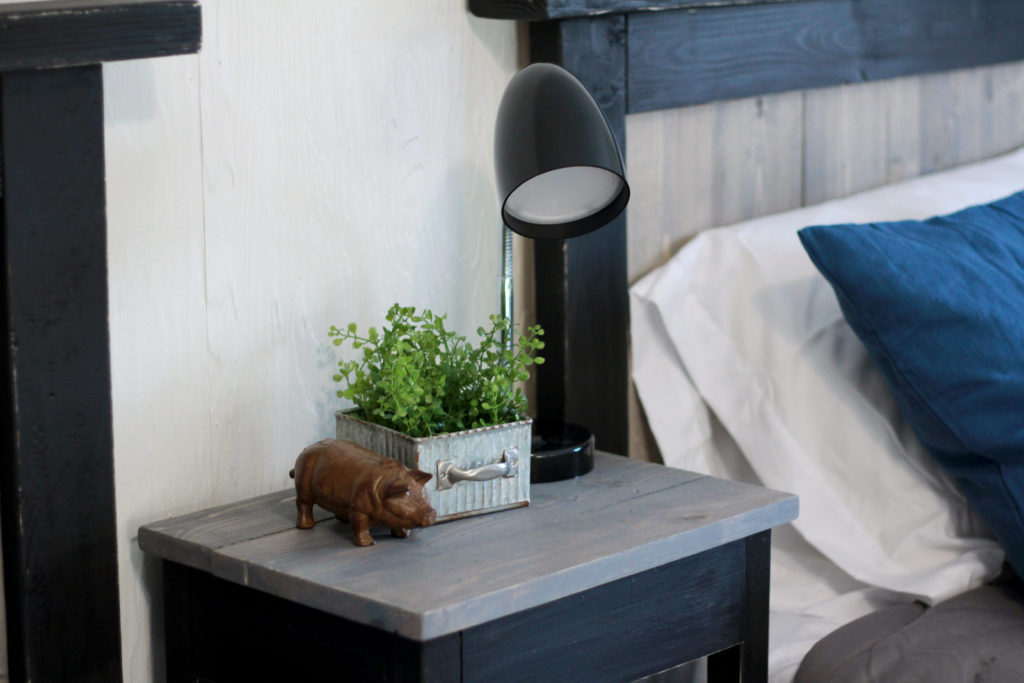
The lamp was found at Walmart for very little $ and the pig and container were found at Hobby Lobby. I also purchased the greenery there and simply set in inside the metal container.
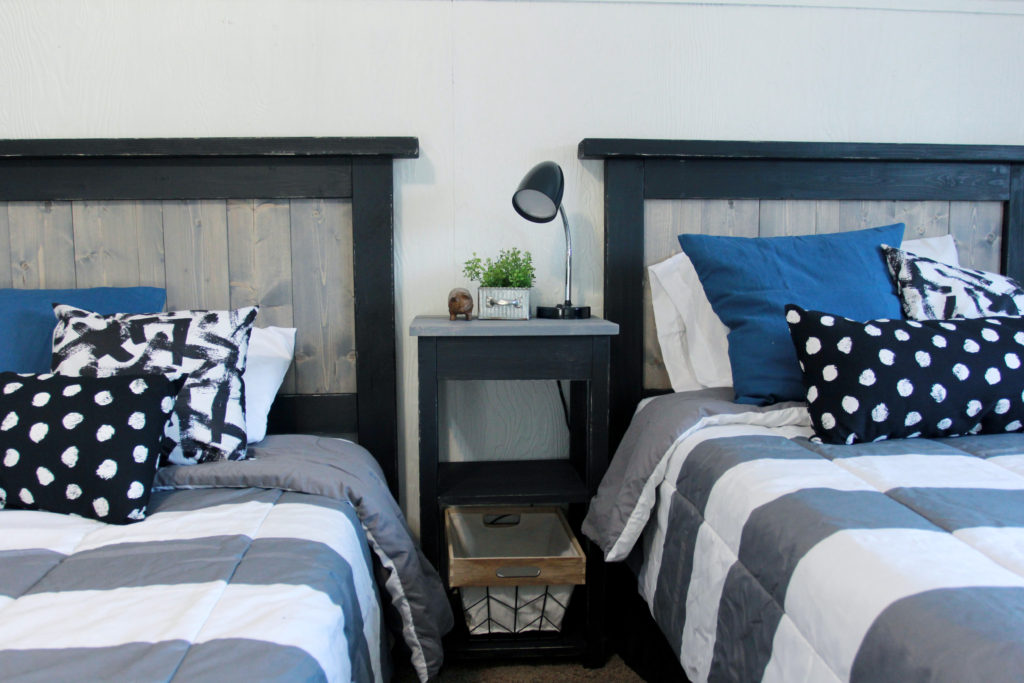
The individual laundry bins make for another pop of design as well as giving each child their very own.
Sneaky move making the thing they are excited to call their own a chore.
Revealing the surprise
After a very long day, I finally got to bring the family upstairs to reveal their new space. The boys were so excited. They claimed their beds and commented on everything. Watching their faces light up was so rewarding!
Then, I revealed the surprise. I let them know of the generous hearts of so many people who didn’t even know them. The mom’s eyes filled with tears and her gratefulness poured out.
“I’ve heard of this sort of thing happening to others. I can’t believe it’s happening to me.”
This was more than a room makeover. This was getting to be the hands and feet of Jesus to a family who is already doing the same for these boys.
I’m so grateful for the opportunity I was given to be trusted with others’ finances and to transform this space for such a deserving family. I hope that everyone feels pleased with what was accomplished. I know I am.
Other Posts you might like
- Nursery Remodel: Mountain Mural
- Bible Journaling for Beginners
- How To Reactive To Negative Comments When You Have All The Same Gender Children (or really any children)

Leave a Reply